# Customise Views
# Introduction
Views are different ways of viewing and manipulating the data/information of a definition. They allow different perspectives on the same given data, without altering the underlying structure of the definition.
When creating or altering a View, you can adjust how the data is presented in the list of a definition, without affecting the original data. This may include alterations in the visualization, size and order of the columns for organization and grouping of the data. It doesn't include filtering data.
For example, a View can be created to increase the size and change the order of certain columns, allowing users to better view information relevant to a given analysis or task.
In short, Views provide flexibility and customization in the way that the data is displayed and manipulated, making it easier to analyze and interpret complex sets of information.
# How to visualize, resize and sort columns
Visualizing, resizing and sorting colums are features of the CoB platform that provides greater flexibility in data manipulation and visualization.
To view an hidden field, click on the arrow next to the Actions column and select the field you want to show up from the list of fields belonging to that definition. To hide a field, deselect it from that same list.
To resize a column just hover the mouse cursor on top of either the left or the right border of the column and continue to drag the border until the column reaches the size you want.
To sort a column according to an ascending or a descending order just click on its title. Each click will change the sorting order of the data in the column.
You can also change the order of the columns. You can, for instance, move the one most to the right all to the left. To move a column you just need to press the left mouse button over the title of the column you want to move and drag the cursor to the position where you want to put the column.
# How to save your view
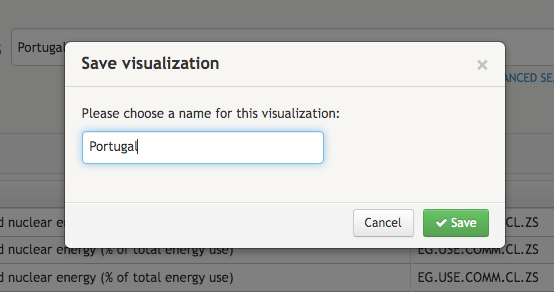
After selecting, sorting, resizing, and moving the columns according to your needs, you can save that view. To save a view you need to click on the Save button next to the button that indicates which view is active. A modal box titled Save visualization will show up asking you to give a name for the view.

Enter the name and click save.
# How to share and delete a view
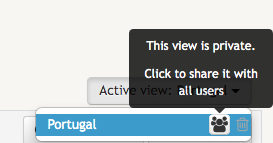
If you want to share your newly created view with other users, you can click on the Active View button and then click on the blue icon next to the name of the view.

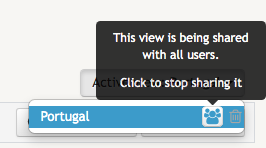
If you change your mind you can always click on top of the same icon. This will make the view private again:

Views that were not created by us but are shared with us provide the name of their creators.
TIP
Views saved and shared by one user cannot be subsequently changed by other users. However, other users can make changes to a view and save it under another name. If the name of the view in question is not changed, an error will occur.
Finally, you can also click on the trash bin icon to delete the view.
